• Skip to primary navigation
  • Skip to main content
  • Skip to primary sidebar
  • Skip to footer

When Feta Met Olive

Albanian and Turkish Cuisine with Donika

  • Home
  • Meet Donika
  • Recipe Index
  • Albanian & Turkish Cuisine

donika

Tatli Pastane Kurabiyesi – Bakery Style Cookies

April 3, 2023 By donika Leave a Comment

These butter cookies are melt in your mouth delicious, very similar to my un kurabiye recipe but this has egg yolks and instead of icing sugar, regular sugar is used.

I like to use my homemade freezer jam for this, but you can use your favourite store bought jam.

You can use any kind of chocolate you want, I use chocolate chips as I always have them.

What you will need:

  • 1 cup softened unsalted butter
  • 2/3 cup sugar
  • 1/2 tsp salt
  • 2 egg yolks
  • 2 cups flour

Other ingredients needed:

  • Chocolate chips
  • Jam of your choice
  • Sprinkles
  • Coconut
  • ground nuts if desired

I make this by hand in a big bowl, if you find the dough to be dry add some softened butter, margarine or shortening to make the dough soft, about a tablespoon worth. The dough shouldn’t be crumbly or hard.

Prepare a piping bag with tip 6B also known as a open star tip.
Fill a piping bag with some cookie dough and pipe small amounts on a baking sheet, I place a piece of parchment on the sheet. Pipe small amounts about a 1 inch in length, they do rise as they bake.

Bake at 350 for 8 to 10 minutes.

Cool and then sandwich with your favourite jam. If you don’t want to sandwich them you can dip each individual cookie in the melted chocolate.

Melt some chocolate chips in a double boiler or microwave if you have one (I don’t).

Add sprinkles in one bowl and coconut in another bowl, after you sandwiched your cookies dip the one end into the bowl of melted chocolate then quickly dip into the sprinkles, coconut and or nuts.

If you are not sandwiching your cookies, just dip each cookie into the chocolate and add the toppings.

Peach, strawberry and raspberry jams are my favourite
They look straight from the bakery

Filed Under: Cookies and bars, Desserts, Jams

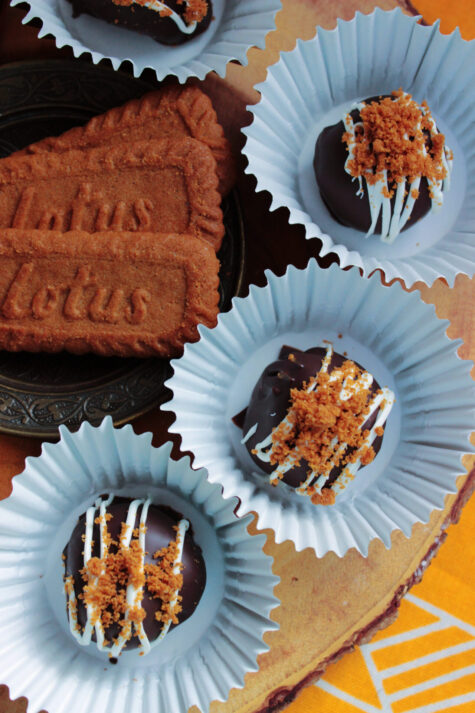
Lotus Biscoff Balls

November 20, 2022 By donika Leave a Comment

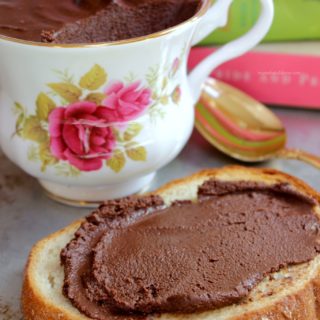
I came up with this recipe because I simply miss my peanut-butter-balls, I’ve grown a intolerance to peanuts, I break out in hives and rash so I avoid it now but miss all my peanut butter recipes. Yes I know there is the ‘non’ peanut spreads but I don’t care for it.
Lotus biscoff is sweeter than peanut butter but has a similar consistency and I like the taste of the spread, so I thought to experiment and have some fun with it. Next time I make them I think I will add some biscoff crumbs or graham crumbs to the mix and see which I like better. Tastes fine to me like this, but wonder how it would be if I added the cookies.

Because of the sweetness I couldn’t use that much icing sugar to help it set, so I thought what would help it harden and white chocolate came to mind, so I used that.

It doesn’t make many balls, as the jar of biscoff spread is small, you will end up making around 15 -18 but if you make the balls smaller you can make more.

I used 4 tbsp white chocolate chips and 2 tbsp icing sugar.

In a small pot over hot water over the stove top I melted the biscoff spread with the white chocolate chips, then stirred in the icing sugar, if the sugar gets clumpy beat it with a wisk.

Refrigerate for a few hours to harden.

Then using a cookie scooper, scoop out into balls you may shape them with your hands to make perfect rounds, place the balls on a wax paper or parchment paper lined pan.

Place the balls back into the fridge for an hour.

You may wonder why I didn’t coat them with white chocolate, I thought the chocolate would cut down the sweetness and it did, if you rather coat them in white chocolate feel free to do so. You can use dark or milk chocolate as well, I used dark but added a little milk chocolate to add a touch of sweetness to the bitter dark.

You can use any of kind chocolate to coat them with, I had chocolate candy melts and since they harden quickly I figured I use it, if I had chocolate bark I would have used that instead but we don’t have that in Canada. To a bowl I added dark chocolate candy melts I used half the bag worth, added 1 tbsp of milk chocolate chips and melted it, I used a double boiler but if you have a microwave, you can use that.

For the garnish I used white candy melts, melted and crushed up Lotus cookies.

Store in the refrigerator.

Filed Under: Dinner

Chocolate Chip Cookies with Brownie Bits

August 18, 2022 By donika Leave a Comment

This cookie is perfect for when you have leftover brownies or if you are a fan of brookies!

I use my brownie recipe for this, I prefer the updated version (check out post) but you can use any brownie recipe for this or if you have store bought ones, that is fine too.

Cut the brownies up in bite size pieces and add 3 to each cookie at the 7 minute mark; I do this so that the brownie doesn’t dry up in the oven the whole baking time also I like the way the cookies bake alone.

For the cookies, you can use 1 cup butter but if you want more of a bakery style use 3/4 butter and 1/4 cup vegetable shortening like Crisco.

I use only 1 cup chocolate chips for this recipe because of the brownie bits, but if you want to use this recipe without the brownies then add another cup of chocolate chips.

For the cookies:

  • 1 cup unsalted softened butter
  • 1 cup sugar
  • 1 cup light brown sugar
  • 2 eggs
  • 1 tsp vanilla or 1 pkt vanilla sugar
  • 2 and 1/4 cups flour
  • 1 tsp baking soda
  • 1 tsp baking powder
  • 1 tsp salt
  • 1 cup semi sweet chocolate chips
  • brownie bits

Preheat oven to 375.

Cream together the butter and sugars until light and fluffy; this takes a few minutes. Add in eggs one a time and beat until light and fluffy, then add in vanilla. In a measuring cup or bowl, whisk together the flour, baking soda, baking powder and salt. Add the flour mixture to the creamed butter mixture and combine until it turns into cookie dough; do not over mix. Stir in the chocolate chips.

Place parchment paper to baking sheets, and scoop up the cookie dough, I use 2 scoops for one cookie and slightly flatten them, I bake 6 cookies on one sheet at a time.

At the 7 minute mark, remove the cookies from the oven and place 3 brownie bits on each cookie, bake for another 2 to 3 minutes.
Remove from oven, transfer to cooling rack after 2 minutes of resting time on the baking sheet.

Repeat until cookie dough and brownie bits are done.

Filed Under: Dinner

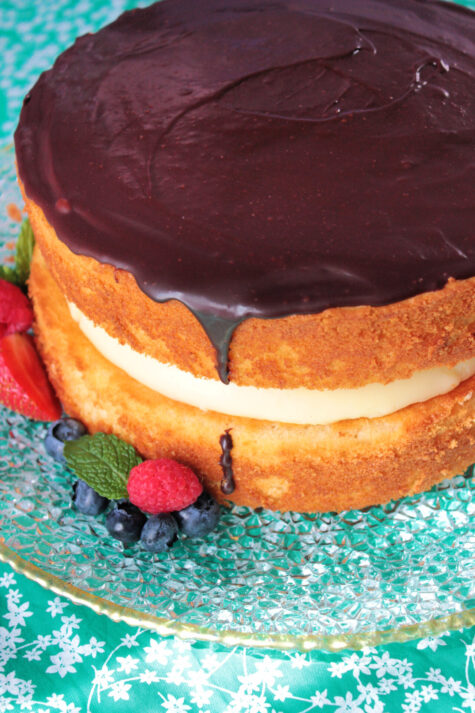
Boston Cream Cake

August 16, 2022 By donika Leave a Comment

When I was a kid my two favourite treats were napoleons from the bakery, and boston cream doughnuts from the doughnut shops. Both are custard filled desserts so I guess you can say I really love my custard haha!

When my kids were younger I used to make this cake often, but it’s been a while since I made it and figured I’d share it with you today.

Plan this ahead so you don’t rush, as both custard and cakes need to be cool before assembling.

You can make this with a cake mix or use your favourite vanilla cake recipe.

For the pastry cream you will need:

2 cups whole milk

4 egg yolks

1/4 cup corn starch

2/3 cup sugar

1 tbsp butter

vanilla bean or 1 pkt vanilla sugar

In a pot, heat the milk until hot, meanwhile in a mixing bowl or measuring cup whisk together the yolks and sugar, add in the cornstarch and mix with a whisk until nicely combined. Take a vanilla bean pod and scrape a little bit off and add that to the custard, if you don’t have any you can use vanilla sugar.

Temper the egg and sugar mixture by adding a few ladles of hot milk, stirring with a whisk. Then pour the mixture into the pot with the rest of the hot milk.

Cook on medium heat, stirring constantly so it doesn’t burn on the bottom. It will start to thicken up in a few minutes. Once it stops bubbling, it is done; it should be thick custard. Add the butter, and once it melts stir it in. Transfer to a bowl, and when it is still warm but not hot cover with plastic wrap directly on the custard.

Refrigerate until cold and firm.

Bake your cake, follow instructions on cake mix or bake homemade vanilla cake in two 8 inch cakes pans. Make sure to grease the pans well and use parchment paper for the bottom for easy removal of cake.

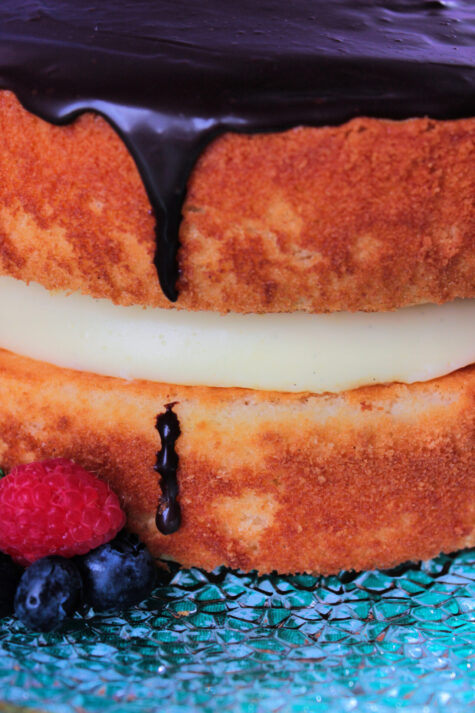
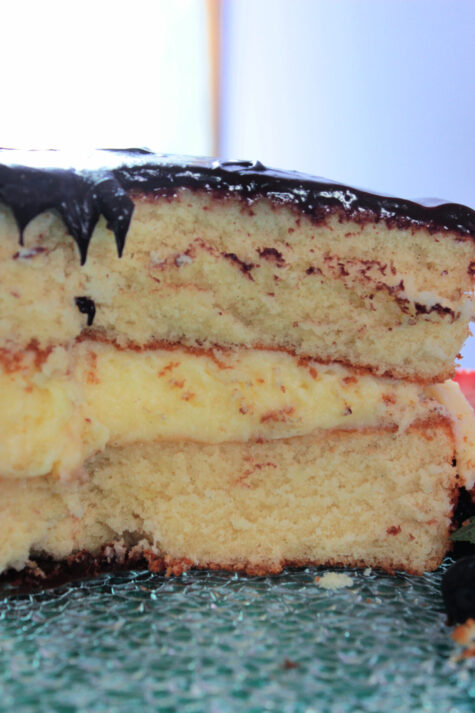
Cool cakes down, and once they are cool, add one cake down on your platter and transfer the custard on top ( I just flip the custard over from the bowl), then add the other layer of cake on top and refrigerate until you’ve made your ganache.

For the ganache, you should use whipping cream (35%) but if you don’t have any, 10% half and half works fine for this as a topping.

When making ganache, you need a 1:1 ratio of cream to chocolate. So if you are using 1 cup cream, use 1 cup chocolate. I use semi sweet chocolate chips for my ganache but you can use whatever chocolate you have.

You won’t need a cup worth of ganache for this, so I would say use 1/2 cup of each cream and chocolate.

Heat the cream in a double boiler, once its hot add in the chocolate and stir until fully combined.

If you don’t have any kind of cream, you can use cool whip as well. Melt down 2 cups of cool whip and stir in 4 oz of chocolate. I have done this many times it works out great.

Now that you have your ganache, pour it over the cake and spread with a spoon until it reaches the edges.

Refrigerate until ready to serve.

It’s best served the same day as custard will crack, but if you want to hide that, whip some 35% cream with a little icing sugar or use frosting and ice the edges to close up the gap and spread the ganache later on.

Filed Under: Dinner

Manti – Turkish Dumplings

February 3, 2021 By donika 2 Comments

I have a new way of making manti and I don’t think I can go back to making it any other way now. Usually I roll the dough out and fold them up into tiny dumplings, but those days are over now thanks to this dumpling maker!

I found this dumpling maker on Amazon and I love it! Dinner was ready in about an hour, and usually takes hours to make manti. There is two versions, the metal and plastic mold. I got the plastic one as it was cheaper in Canada and had quicker shipping, but I would like to get the steel one in the future so I can compare. If you have either let me know below in the comments and tell me the pros and cons of both. I didn’t have a issue at all with the one I got.

For the dough:

  • 3 cups of flour
  • 2 eggs
  • a dash of salt
  • 1 cup of water (approx.)

In a bowl, add in the flour and whisk the two eggs in and add a dash of salt and slowly add in the water and start to knead to form a soft dough. Allow to rest for half and hour.

Topping:

  • 1 and 1/2 cups plain yogurt
  • 2 tbsp pepper paste
  • 1 tbsp tomato paste
  • butter and olive oil

Warm the yogurt either by letting sit out to warm up or warm up in a pot. Season with salt. If you want to add garlic you can, but if not, omit it.

In a small pot, melt a few spoons of butter, some olive oil, and pepper and tomato paste. If you don’t have pepper paste, you can just use tomato paste.

When the tomato and pepper paste separates in the oil, add 1/2 cup water and season with a little salt. Bring to a boil and cook for a few minutes. Set aside until ready to use.

For the meat filling:

  • 1/2 lb to 3/4 lb ground beef
  • 1 small onion grated
  • salt and pepper
  • 1/4 tsp dried mint
  • 2 tsp pepper paste
  • 1 tsp tomato paste

Since I don’t measure the meat I am giving an approximate measurements, so if you end up with extra, you can make a burger haha!

Grate the onion and add to the meat and season with salt, pepper, dried mint, and pepper and tomato paste. If you can’t find pepper paste, you can just use tomato paste. Combine to make the meat filling.

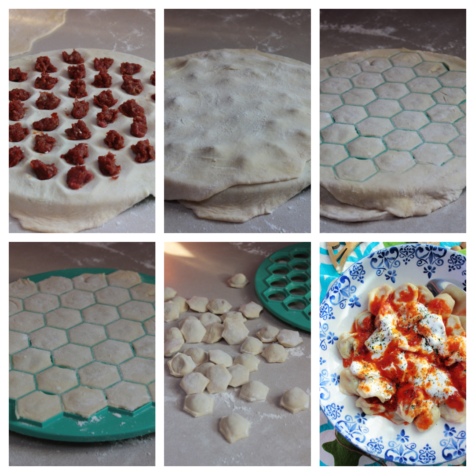
Divide dough into 6 balls, and on a floured surface, roll out into a circle that’s the same size as the dumpling maker.

Add flour to the dumpling maker so the dough doesn’t stick.

Transfer the circle of dough to the maker, and with a small spoon add small amounts of meat filling to each circle as seen in the photos below.

Top with another layer of dough and roll out. Pop out dumplings with your fingers, and continue until all the dough is done.

Bring water to a boil and add some salt.

Boil manti in batches, and since you are cooking raw meat I would say 4 minutes of boiling time or more is good; you can take one out to test the inside. Cook all of the manti and remove with a slotted spoon or pour gently into a strainer.

To assemble it, add the manti to a platter or individual bowls, pour over the yogurt, and drizzle the tomato sauce over, and a sprinkle of dried mint leaves. Ready to serve!

Filed Under: Appetizers, Beef and lamb, Dinner, Pasta

Tiramisu Ice Cream

June 22, 2020 By donika Leave a Comment

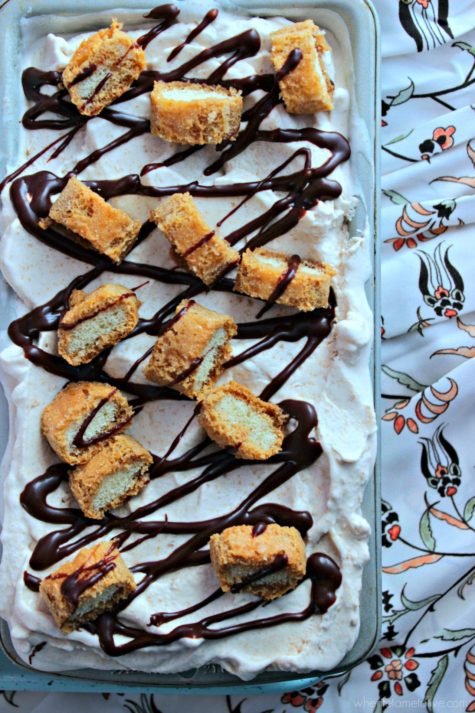
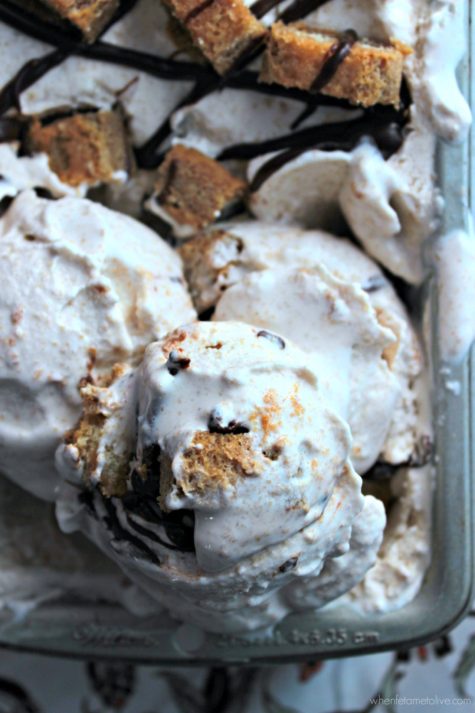
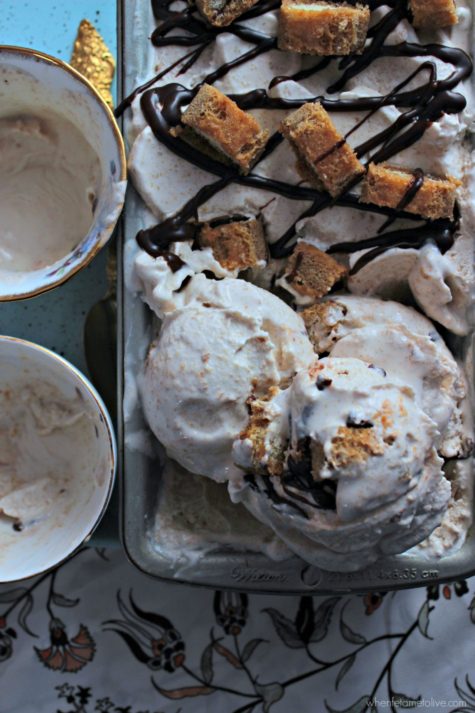
Once upon a time I use to make and sell ice cream, but since I don’t have plans of doing that anymore I figured I can share my recipe for my most popular flavour! You will need a ice cream maker to make this recipe.

What you will need:

  • 2 cups 35% whipping cream
  • 1 cup 2% milk
  • 3/4 cup + 2 tbsp sugar
  • 1/2 pkg of cream cheese
  • dash of salt
  • 1 tsp of vanilla
  • 5 lady fingers dipped in strong coffee
  • 1/2 tsp cocoa

Combine the cream cheese with sugar and vanilla, stir until blended well, add in the milk and cream and the dash of salt, stir and mix until blended well.

Refrigerate for 4 hours or over night.

Churn in the the prepared frozen ice cream bowl for about 22 minutes.

In the meantime, dip the lady fingers in the coffee, sprinkle with a little cocoa and cut into small pieces.

Add in the lady fingers at the 19 minute mark.

Pour ice cream in a freezer safe container, freeze until ready to serve.

Filed Under: Desserts, Ice Cream

Tave Peshk me Qepe Fish with Caramelized Onions

June 16, 2020 By donika 2 Comments

My grandparents originally come from Pogradec, Albania, so they loved fish, fresh from the lake as they would say, not like the fish we get at the supermarket here. This dish I am sharing with you is a traditional dish that my grandma taught me.

You can use any kind of fish you like. I personally love salmon but I didn’t have any, so I used cod fish.

My mom makes this a bit on the plain side like grandma used to do, but I added ingredients that are not so traditional but more to my liking. To keep it traditional, use paprika and salt. To top it up a notch, try the version that I am sharing with you today!

You will need:

  • Filet of fresh or frozen salmon, cod or rainbow trout or a bag with individual pieces*
  • 5 large onions
  • For seasoning I use salt, Tex Mex seasoning, seasoning salt, paprika, sriracha.

For the seasoning, start with very little, caramelized onions already have flavour with the salt so you just need a dash of this and that, until you are happy with the flavour.

Slice onions and in a frying pan with some oil (be generous). Cook the onions down until lightly browned on low heat. You want to caramelize the onions, not fry, so slowly cook the onions. Once onions are getting darker in colour, season them, taste and adjust as you like.

Cut the fish into portions, and season the fish, place the caramelized onions to a baking pan and place the fish over the onions. Bake for 20 minutes at 350. Fish should be done by that point if it isn’t thick, but make sure to check on it. Serve with salad and bread or pasta salad on the side. My family likes it with rice and cucumber salad.

*You can use the frozen fish that comes in a package like the ones at Costco. Check for wild caught, and try to avoid farm grown fish when possible.

Filed Under: Dinner, Seafood

Sebze Corbasi – Vegetable Soup (with noodles)

June 10, 2020 By donika Leave a Comment

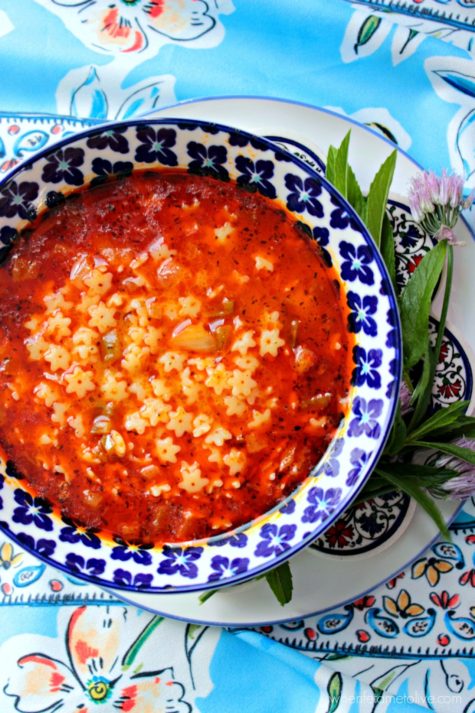
This is a simple no fuss soup that we all love. Growing up, vegetable soup was my favourite soup. I added star shaped noodles because my mom always uses them in soups and I think they look so cute! You can use any small noodle you like, such as filini, orzo or acini de pepe. You can add frozen mixed veggies in this as well.

Noodles or pasta? Growing up pasta meant cake and makarona meant pasta like penne or rotini and noodles were anything small that you add to soup, so when I say noodle I mean any small pasta. Just thought I’d tell you that haha!

v

What you will need:

  • 1 small onion or shallot
  • 1/4 green bell pepper
  • 1 tomato
  • 1 and 1/2 tsp biber salca (pepper paste)*
  • 1 tsp flour
  • 1/2 cup star shaped noodles*
  • 3-4 tbsp of mixed frozen veggies (if using)
  • 4 cups boiled water
  • 3 tbsp olive oil
  • salt
  • 1 cube veggie or chicken cube
  • 2 tbsp butter
  • 1/2 tsp dried mint
  • 1 flattened out tsp of paprika

Chop and dice up the onion and green bell pepper, and cook in a sauce pan with the olive oil until tender. Add in diced up tomato, pepper paste and flour. Season with a little salt and add in the veggie or chicken flavoured cube. Add in the frozen mixed veggies if you are adding them.

Add in the noodles and boiled water, and cook until noodles are soft.
In a small pot or Turkish coffee pot, add the butter, mint and paprika. Melt the butter with the paprika and mint and pour over the soup.

You can serve with a fresh squeeze of lemon juice or as is.

*You can use tomato paste if you don’t have pepper paste.

*If you are using orzo, it needs more liquid as they take longer to cook and absorb more of the liquid. You may want to add an extra 1/2 cup of water.

Filed Under: Dinner, Soups

Bahar Burek – Springtime Burek

May 20, 2020 By donika Leave a Comment

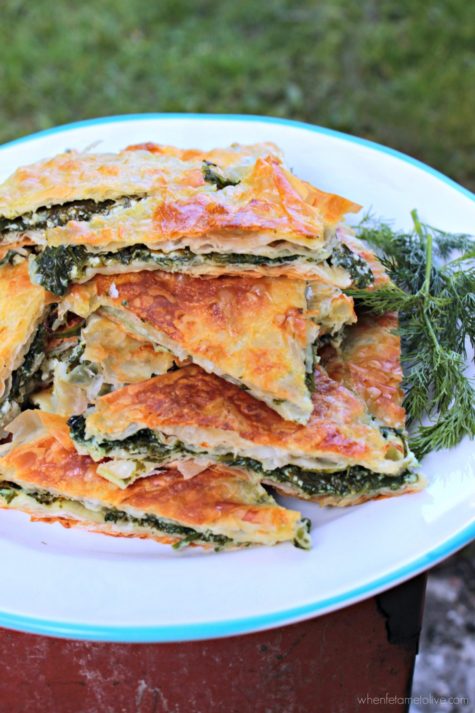
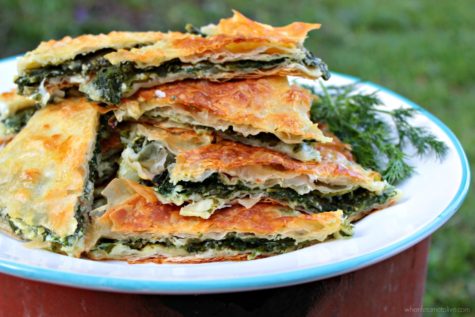
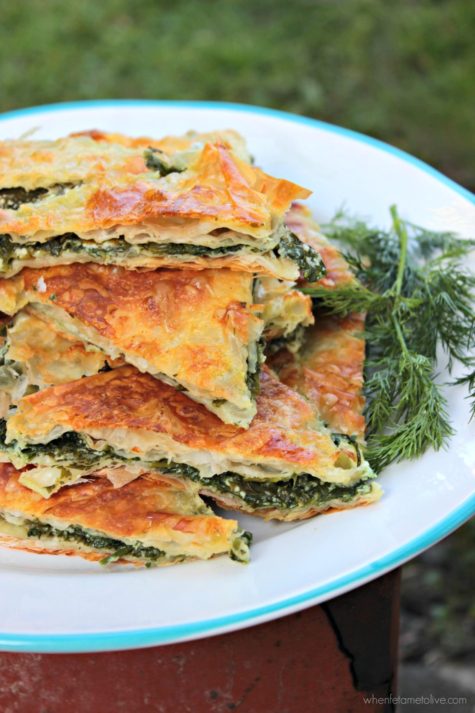
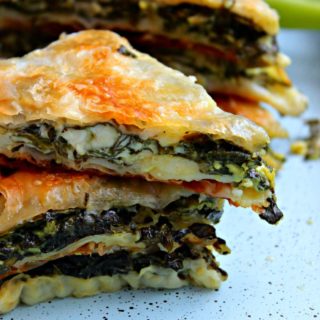
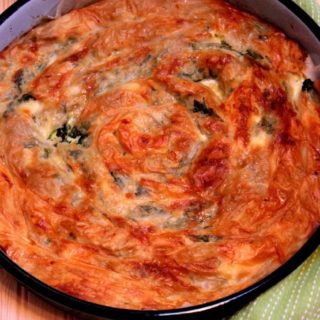
I decided to call this bahar burek because it tastes like spring/summertime: fresh and bright! The addition of dill and parsley gives it a garden-fresh taste. I call it bureku e baharit in Albanian. Bahar, I assume is the old Albanian word for summer, as bahar does not show up when you translate summer in Albanian, however that is what my grandparents always called it. If you look up bahar you will find that it is spring in Turkish, so for that reason I called it springtime.

Anyways I got the inspiration from my spinach lakror, since it is Ramadan I was craving it but didn’t have the energy to make homemade filo dough, so I used the frozen stuff and it turned out great!

What you will need:

  • 1 pkg filo dough -thawed
  • 1 pkg of baby leaf spinach
  • 3/4 cup crumbled feta cheese
  • 1 cup chopped up fresh parsley
  • 1 cup chopped fresh dill
  • 4 springs of green onions
  • 1 cup of milk
  • 3 eggs
  • 1/2 cup olive oil
  • salt

Preheat oven to 350.

Rinse spinach and pat dry with a tea towel or paper towel, or spin dry in a salad spinner.

Combine the spinach, feta cheese, dill, parsley and chopped green onions – I find it easiest to mix the ingredients by hand. Season with salt, but remember that feta cheese is salty, so you don’t want to use too much.

In a mixing bowl, whisk together the milk, eggs, and oil. Season with some salt.

To start, grease your pan, or place a piece of parchment over the pan then place two sheets of filo dough on the bottom of the pan and sprinkle over some of the milk mixture – make sure not to soak the filo sheets in this mixture at this point. Repeat these steps until half of the package of filo is done. Add the spinach filling once you’ve layered half of the package, then continue with the layering of the filo and milk and egg mixture. When done layering the filo, cut into squares or triangles, and pour over the remaining milk mixture.

Bake in the oven for 30 to 40 minutes or until golden and crisp at the edges.

Remove from pan and transfer to another pan lined with paper towel to soak up any moisture, sometimes you don’t have to depends on the spinach, sometimes it comes out completely dry.

Filed Under: Burek/Börek, Dinner

Potato Burek

May 15, 2020 By donika 2 Comments

Potato burek is a simple and delicious dish. We have been making it more often during the isolation, since we don’t go out as often to get ingredients and we have potatoes and filo dough stored.

You will need about 7 potatoes, give or take, depending how small or big your potatoes are. If you end up with extra filling, you can always eat it as is.

  • 1 pkg thawed filo dough
  • approx. 7 potatoes
  • 2 tbsp tomato paste
  • 1 tbsp or a bit more of pepper paste
  • olive oil
  • 1 onion
  • salt to season
  • 1/2 cup butter
  • 3/4 to 1 cup milk
  • 2 eggs
  • black seed

Peel the potatoes and cut into pieces. Boil and season with salt so the potatoes are not bland.

Chop the onion and cook in a pan with a good amount of olive oil. You will need to be generous with the oil as potatoes are dry. Add in the tomato paste and pepper paste, but if you don’t have pepper paste, just use tomato paste. Add in the potatoes and mash with a potato masher or fork. Season with salt.

In a small pot, melt the butter. In a medium sized bowl, whisk together the eggs and milk, add a little salt to season, and stir in the melted butter.

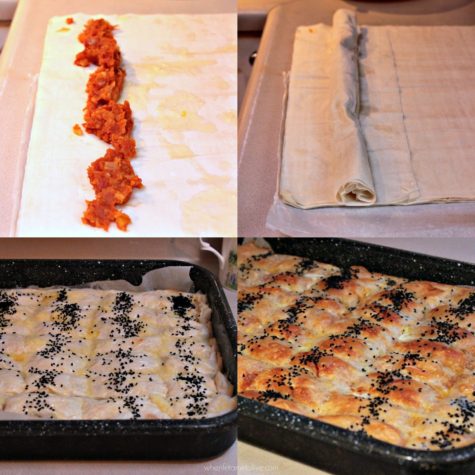
Lay our your filo dough, and spoon over the milk mixture, add a few tablespoons of potato filling across the filo dough and roll up, 2 filo at a time. Add to a baking pan that will fit the rolls. Continue until you finish the potato filling. Once all the rolls are finish and in the pan, cut the rolls into 2 inch size pieces, pour over the milk mixture, and sprinkle with black seeds. Bake at 350 for 25 to 35 minutes depending your oven.

You can add more or less filling, this picture looks like it is a lot of
filling but
it is only a few tablespoon worth.

Filed Under: Burek/Börek, Dinner

  • Go to page 1
  • Go to page 2
  • Go to page 3
  • Interim pages omitted …
  • Go to page 61
  • Go to Next Page »

Primary Sidebar

  • Facebook
  • Instagram
  • Pinterest
  • Twitter
  • YouTube

Search Recipes

Categories

Try Prime Discounted Monthly Offering

Tatli Pastane Kurabiyesi – Bakery Style Cookies

Lotus Biscoff Balls

Archives

Footer

Connect

Donika has been blogging for years perfecting her craft in the kitchen. Cooking from Albanian and Turkish backgrounds her recipes will definitely make their way into your kitchen! Read More…

  • Facebook
  • Instagram
  • Pinterest
  • Twitter
  • YouTube

Copyright When Feta Met Olive 2010-2020 © 2023 ·When Feta Met Olive · Genesis Framework by StudioPress · WordPress